Skip to Main Content
SUNY OLIS logo
 

Alma Electronic Resources Management

Working with and managing electronic resources in Alma.

Working with Licenses in Alma

Alma offers functionality to store licenses, track the status of licenses, and publicly display selected license terms in Primo records. This page outlines the process to add a license to Alma as well as configurations available for license management in Alma, including managing license terms, ordering license sections, names and descriptions of license storage locations, license review status, and how to publicly displaying license terms in Primo.

To work with licenses in Alma, one needs the role of License Manager. To view licenses in Alma one needs one of the following roles: License Viewer, Selector, Purchasing Operator, or Purchasing Manager.


Viewing and Adding Licenses

Licenses can be found in the Acquisitions menu and Acquisitions Infrastructure section. To view or add a new license, click the Licenses option.

  • To add a new license, click the Add License button.

add license

Add a License Manually

  • Select Manually in the Add License drop down menu to add a license manually.
  • In the Summary tab of the License Details page, add a name and license code. Assign a License Status and assign the vendor to which the license belongs using the Licensor menu. Enter information into the remaining fields and click Save.

summary tab

  • Navigate to the License Terms tab and enter license terms from the license into the appropriate sections.

license terms

  • Update the Inventory and PO Lines tabs with the appropriate resource(s) and PO Lines to which the license applies. Add any necessary Amendments in the Amendments tab.
  • Upload the actual license as a PDF file in the Attachments tab.
  • Click Save when complete.

Duplicate a License

Once a license has been created, it's possible to duplicate the license and edit it. Use the ellipses to select Duplicate and then use the ellipses to select Edit to revise the copied license.

duplicate license

Save as License Template

  • To reuse a manually created license as a template, click the Save as Template button in the top menu.

save as license

  • Enter a name and license code for the template and click Save. Alternatively, update an existing template by selecting it from the drop down menu and click Save.

save license


Manage License Terms

To add, configure or reorder license terms, navigate to Configuration, the Acquisitions menu, the Licenses section, and click on Manage License Terms.

Add a License Term

  • To add a license term, click the Add License Term button.

manage license terms


  • Name the license term and assign it a unique code. Assign a license section and order in which the term should appear in the section. Then, select a license term type.

add a license term

The license term types are defined as follows:

  • FREE-TEXT - Free text
  • LicenseTermsPermittedProhibited - Permitted or prohibited options: Uninterpreted, Not Applicable, Silent, Prohibited, and Permitted. These terms conform to Digital Library Federation (DLF) standards.
  • LicenseTermsRenewalType - Renewal type options: Explicit and Automatic
  • LicenseTermsUOM - Calendar selection: Week, Calendar Day, Month, and Business Day
  • LicenseTermsYesNo - Yes or No options.
  • Controlled Vocabulary - Create your options for the drop-down after creating this type
  • NUMERIC - A numeric field

Note that if you are selecting a Controlled Vocabulary license term type, you will be prompted to define the controlled vocabulary. Use the Add Value button to add values to the term:

add values


add and close

  • Click Add and Close when complete.


Configure the Section and Order of a License Term

In the same Manage License Terms table, use the drop down menu and editable fields next to each license term to assign a different section or order to the license term:

assign a section

Display License Term(s) to the Public in Primo

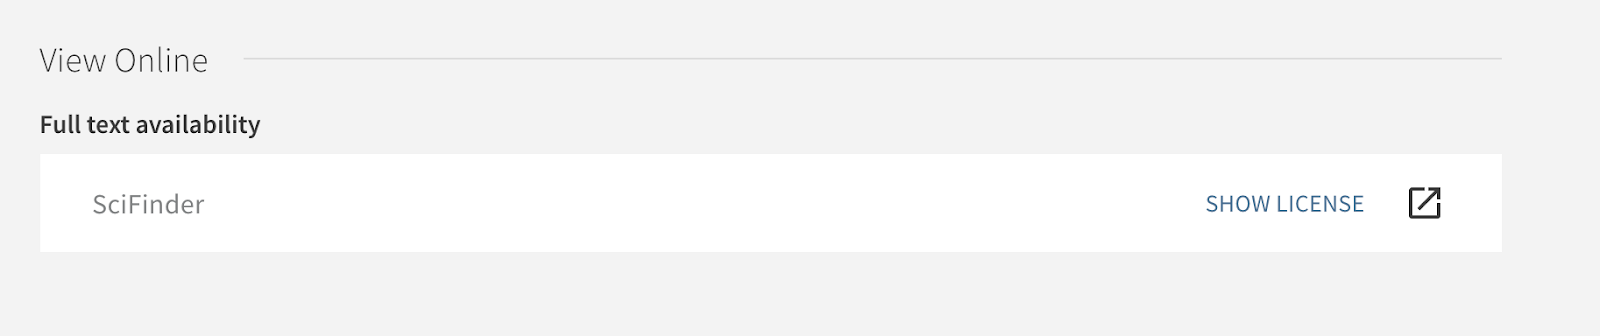
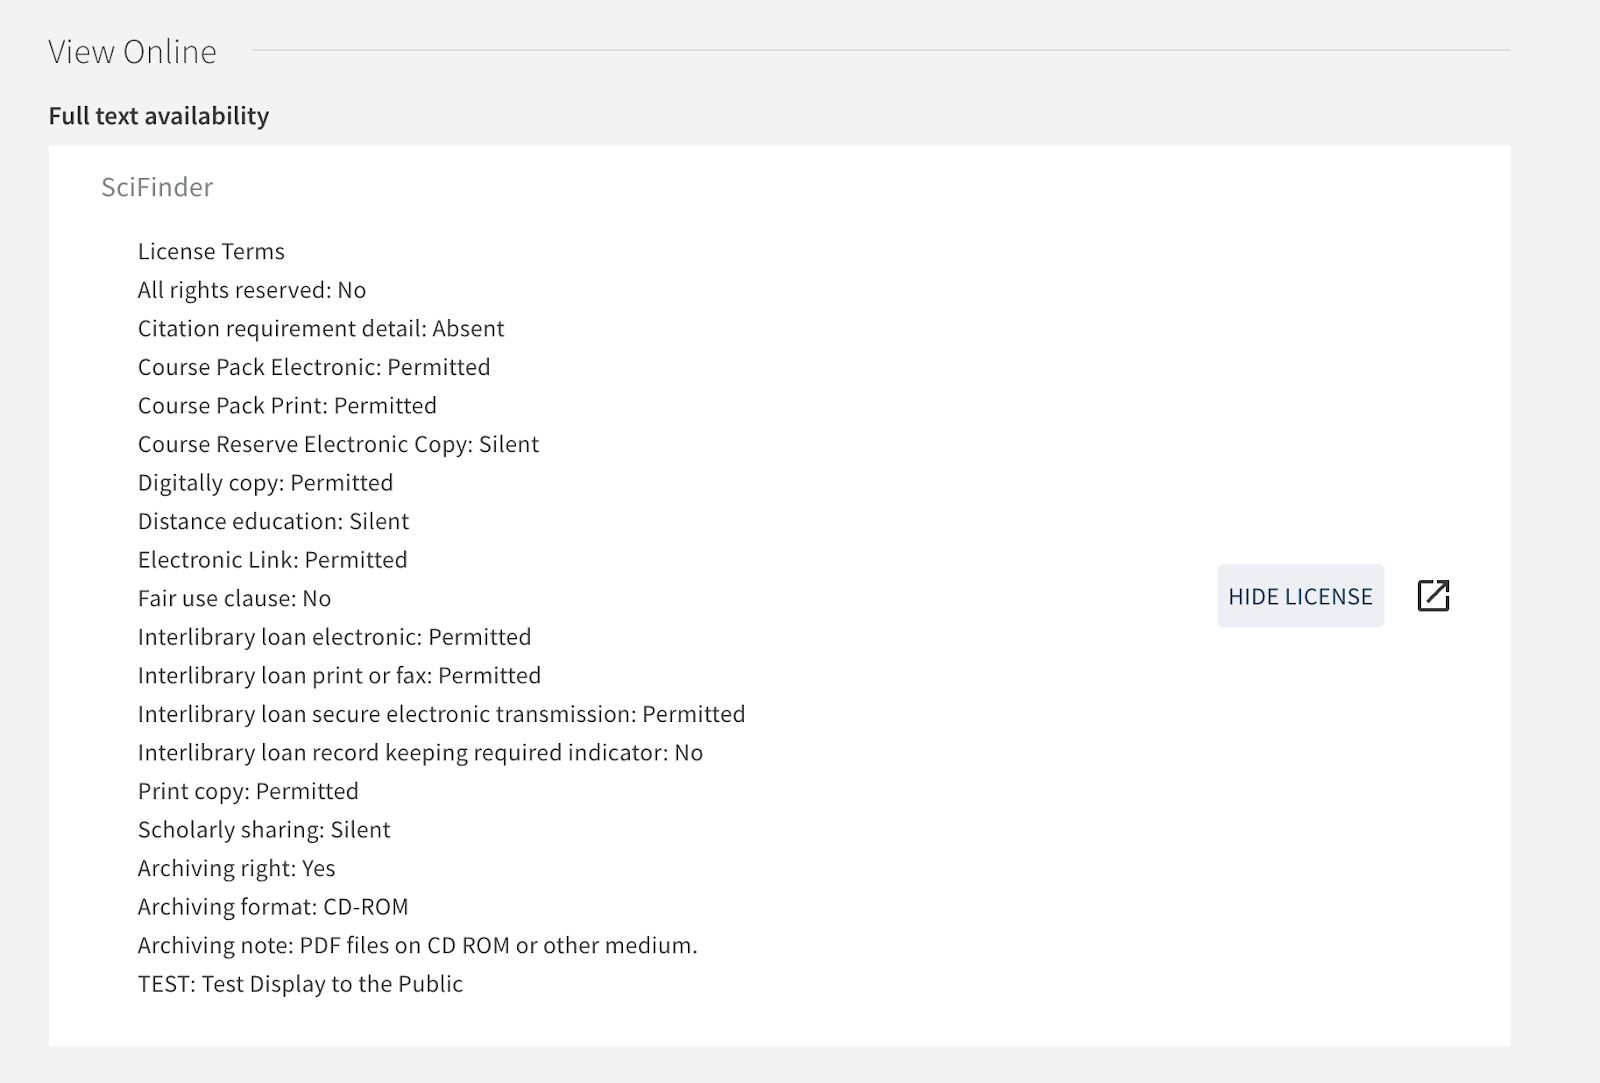
License terms can be displayed in Primo by changing the settings of two different tables in the Alma Configuration.

  • First, in the Manage License Terms table, use the Display to Public drop down menu to select Yes for the desired license term. (Navigate to Alma Configuration, Acquisitions menu, Licenses section, and click on Manage License Terms.)

display to public


  • Then, enable the display of license terms in the Discovery Interface Display Logic. (Navigate to Alma Configuration, Fulfillment, menu, Discovery Interface Display Logic section, and click on Other Settings.)
  • Check the box to Enable the Display of License Information
  • Click Save

license other settings


The license term will display like the following in Primo:

license term display


full license display


Configure the Order of License Sections

Although the name of license sections cannot be changed, it is possible to reorder license sections. To start, navigate to Configuration, Acquisitions, Licenses, Section Order.

  • The license section order cannot be changed, instead one has to delete the section and then re-add using the desired order number.
  • Select the license section to reorder and use the ellipses to Delete it.

reorder license sections


  • Click the Add Row button to add the license section back with the desired order.

add license row


  • The row with the license section will appear with its order number:

order number

Further License Configurations

Configure License Storage Locations

  • To configure the display name of storage locations for licenses, navigate to Alma Configuration, Acquisitions menu, Licenses section, and click on License Storage Location
  • Click the Add Row button to add a new storage location
  • Enter a name and description, and select whether or not the display location is the default.
  • Click Add Row

add storage location

  • The new storage location will appear in the Code Table:

storage location code table


  • Storage locations can be deleted by using the ellipses to select Delete. Click Save when complete.

delete storage location


Configure the License Review Status

  • Navigate to Alma Configuration, Acquisitions menu, Licenses section, and click on License Review Status
  • Existing license review statuses can be enabled or disabled, reordered, made a default value, or deleted

license review status

  • To add a new license review status, click the Add Row button

add license review status

  • Enter a code and description, and select whether the new status should be the default. Click Add Row to add the new status to the Code Table. Click Save when compete.

add status to code table

Licensing Documentation and Training

SLS FAQs about Licensing